
Raised-heel trusses for Minnesota homes
Published October 28, 2026 · Reviewed October 28, 2026
The edge of a roof is a crowded place. The wall ends, the roof starts, insulation needs space, ventilation may need a clear route, and structural forces must pass from the roof into the walls. A raised-heel truss helps organize that intersection, provided it is designed and installed as part of the whole building.
For Minnesota homeowners, the useful question is not simply whether a roof has “energy trusses.” Ask what heel height is specified, what fits beneath the roof deck, and how the truss connects to the structure below.
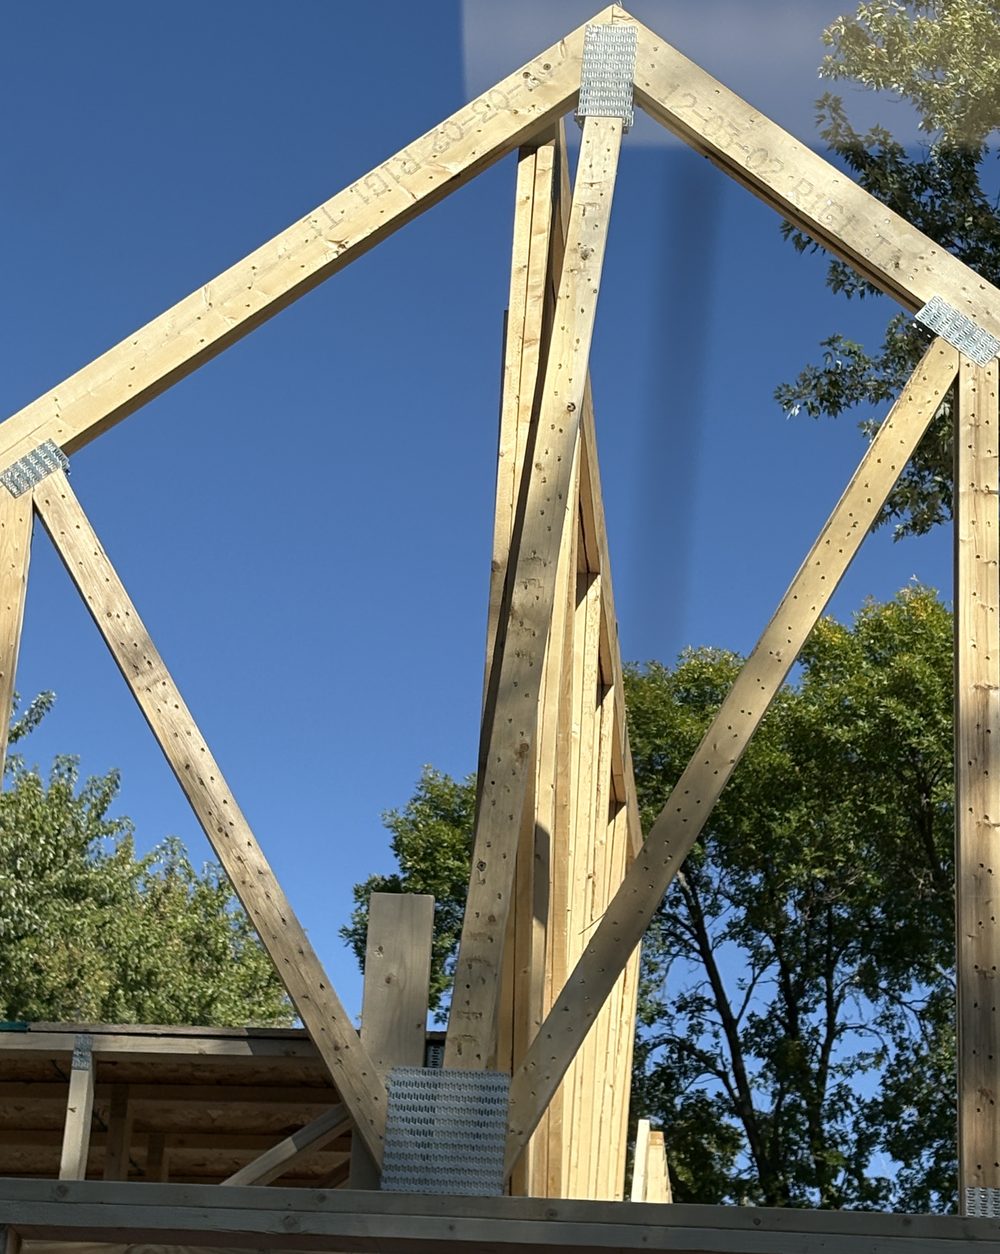
What a raised heel changes
The heel is the truss area at the outside bearing wall where the upper and lower portions meet. Raising that area creates more space above the wall’s top plate. That space can accommodate insulation without squeezing it into a thin wedge at the eave.
APA describes raised-heel trusses as a way to provide insulation room at the building perimeter. For a vented attic, baffles and a properly detailed eave also help keep ventilation air above the insulation rather than through it. The benefit depends on the completed assembly, including air sealing. A taller truss alone does not guarantee comfort or eliminate ice dams.
Minnesota has a specific energy-heel provision
The residential energy table in Minnesota Rules 1322.0402, subpart 1, includes footnote j requiring a minimum six-inch energy heel for roof/ceiling assemblies. The same component table lists R-49 ceilings for both Minnesota residential energy zones, 6 and 7.
Those numbers must be read with the table’s footnotes, the applicable assembly provisions, and the approved compliance path. Six inches is not a universal design height for every insulation material. The designer must reconcile installed insulation depth, roof geometry, ventilation where used, and the other roof details.
Confirm the heel dimension before approving the truss package. Moving this discussion to the jobsite can affect fascia heights, sheathing lengths, connections, and other work already underway.
Order the roof that the house actually needs
Engineered trusses are designed for identified conditions. The order should match the current building plans, including roof shape, bearing locations, ceiling profiles, openings, and loading requirements.
Discuss foreseeable equipment and use early. An attic intended only for access is different from a space intended for storage. Future solar equipment, mechanical equipment, or a large attic opening may also require design coordination. Mentioning an idea to the crew is not the same as including it in the design.
Minnesota’s structural criteria are separate from energy climate zones. Snow and wind design must come from the applicable structural provisions and project conditions, not from a “zone 6” or “zone 7” label.
Check the drawings and the delivery together
Section R802.10 of the 2020 Minnesota Residential Code addresses wood trusses. DLI’s residential plan-review guidance specifically identifies truss design, alterations, bracing, and roof tie-down as review items.
Before installation, the builder should reconcile the truss package with the approved building documents. Useful checks include:
- Truss identifiers and placement match the layout.
- Required bearings exist where the drawings show them.
- Girder trusses, connections, and supporting posts are identified.
- Heel details and roof-to-wall connections are coordinated.
- Damage, missing information, and conflicts are resolved before affected work proceeds.
A bundle that arrived on time can still contain a question that needs an answer. Put that question in writing and connect it to the relevant drawing.
Temporary restraint and permanent bracing serve different needs
Trusses need a planned installation sequence and appropriate restraint while the roof is being assembled. They may also require permanent restraint and diagonal bracing after installation. A roof that appears straight from the driveway is not evidence that every permanent bracing detail is complete.
R802.10.3 addresses truss bracing, and R802.11 addresses roof tie-down. The Structural Building Components Association’s BCSI guidance provides industry information on handling, installation, restraint, and bracing. It supports the work; it does not replace the project-specific design.
Raised heels also change the roof-to-wall intersection. APA publishes details for certain continuous-sheathing systems, but their scope and limitations matter. Do not assume a strip of sheathing automatically replaces every block, strap, or uplift connector.
Never solve a conflict by cutting a truss
A duct that does not fit is a coordination problem, not permission to remove a web. Section R802.10.4 governs truss alterations. Do not cut, drill, notch, splice, or otherwise alter an engineered truss without the required registered design professional’s approval and a documented detail.
The same caution applies to damaged trusses and added loads. Stop the affected work, identify the truss, photograph the condition, and obtain the necessary review. A repair should be traceable to its approved instructions and checked after installation.
Ask for a complete roof handoff
Keep the final truss layout, design drawings, approved repairs, and inspection information with the project record. Before concealment, resolve outstanding bracing and connection items and confirm that the eave is ready for the insulation and ventilation work that follows.
Contact Timberline Framing to discuss your roof-framing scope and the information needed before scheduling. For the wider context, read our cold-climate roof guide and wall-bracing guide.