
Framing Basics
Know Your Framing: An Illustrated Guide to the Parts of a House
Learn the names and jobs of common house-framing parts with a clear illustrated guide for Minnesota homeowners preparing for a construction walkthrough.
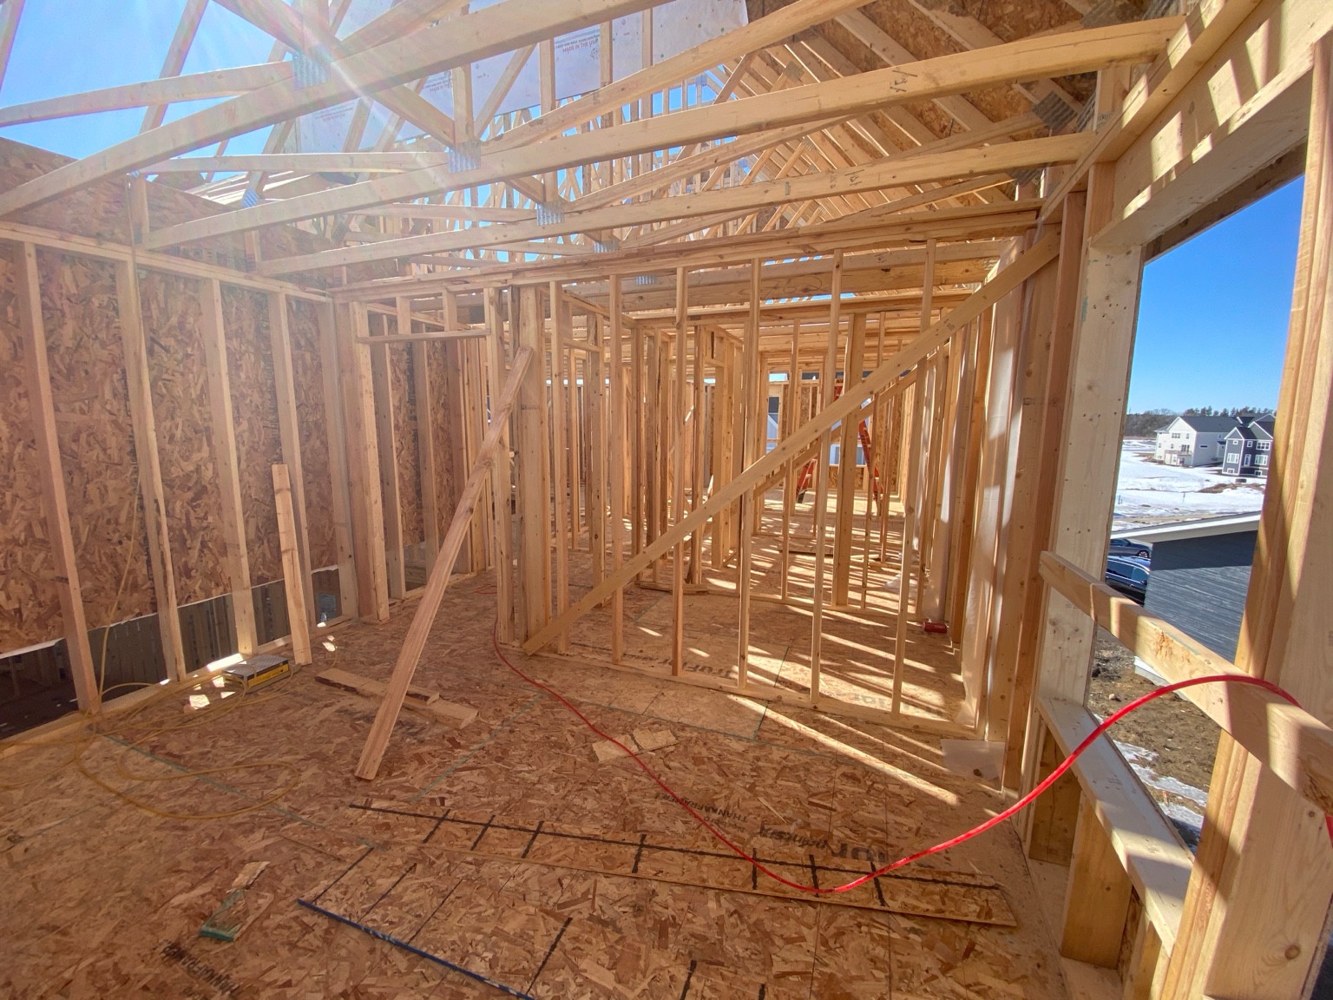
A framing walkthrough is easier when “that board over there” has a name. You do not need a carpenter’s vocabulary to be a good customer, but a handful of terms makes questions clearer and decisions faster.
The illustrations in this guide are simplified concept diagrams. They identify parts; they do not show member sizes, fastening schedules or an engineered assembly. Your house may use a different arrangement, and that is not automatically a problem.
Read a wall from the bottom up
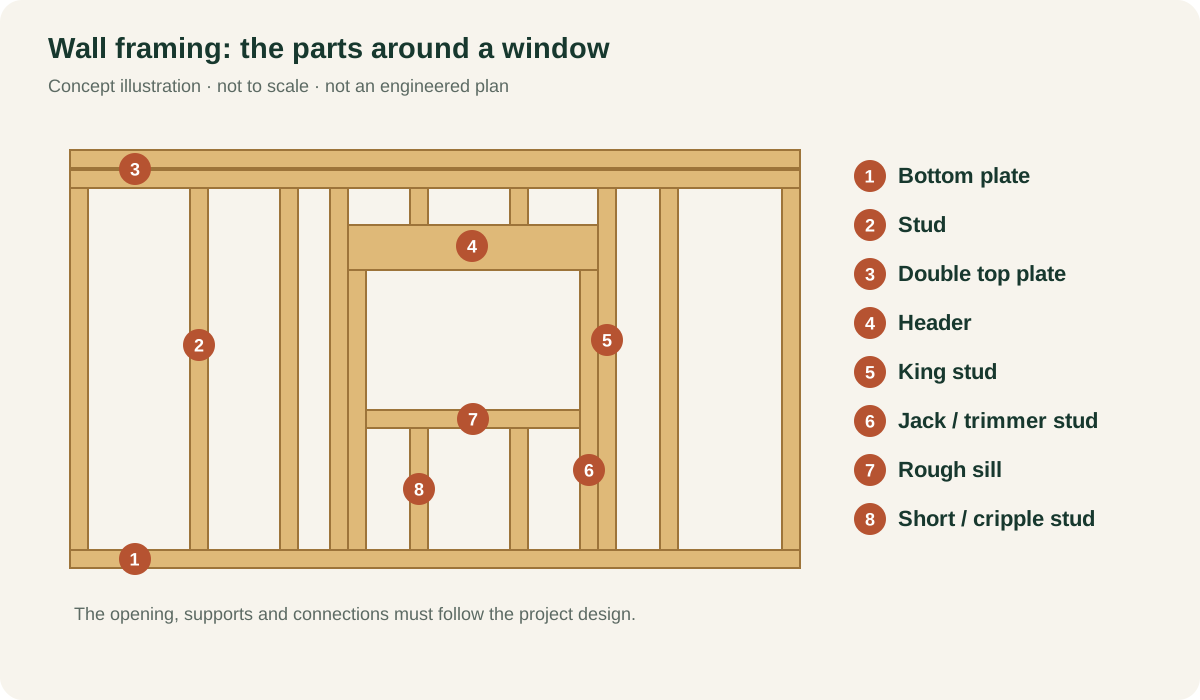
Bottom plate: The horizontal member beneath a framed wall’s studs. It locates the wall and provides a connection surface. Depending on the location, it may sit on a wood floor or a concrete slab. The material and separation details depend on the assembly.
Stud: A vertical framing member. Studs support the wall’s surfaces and, in bearing walls, help carry loads. Stud size and spacing come from the design, not from whether a room feels important.
Top plate: The horizontal member across the upper ends of the studs. Many walls have a second plate above it. The plate arrangement helps connect the wall and transfer loads from above within the designed system.
Blocking: Short pieces installed between other framing members. Blocking can provide support for panel edges, restraint or backing for an attachment. Its purpose depends on where it is used. Ask what a particular block is doing before assuming an empty space needs one.
Understand an opening
Header: The member spanning above a window or door opening where the design requires it. It helps move loads around the opening to supports at the sides. Header material and size vary with the loads and span.
King stud: A full-height stud beside an opening. Jack or trimmer stud: A shorter support beside the opening that commonly bears a header. Actual support details can use different arrangements, including engineered members or hardware.
Rough sill: The horizontal framing below a window opening. It is not the finished windowsill you see inside the room. Short studs, often called cripple studs, may occur beneath a rough sill or above a header.
Rough opening: The framed space reserved for the window or door unit and its installation. It must match the selected manufacturer’s requirements and the design. The product’s advertised size is not always the dimension the framing crew needs.
Look beneath the floor
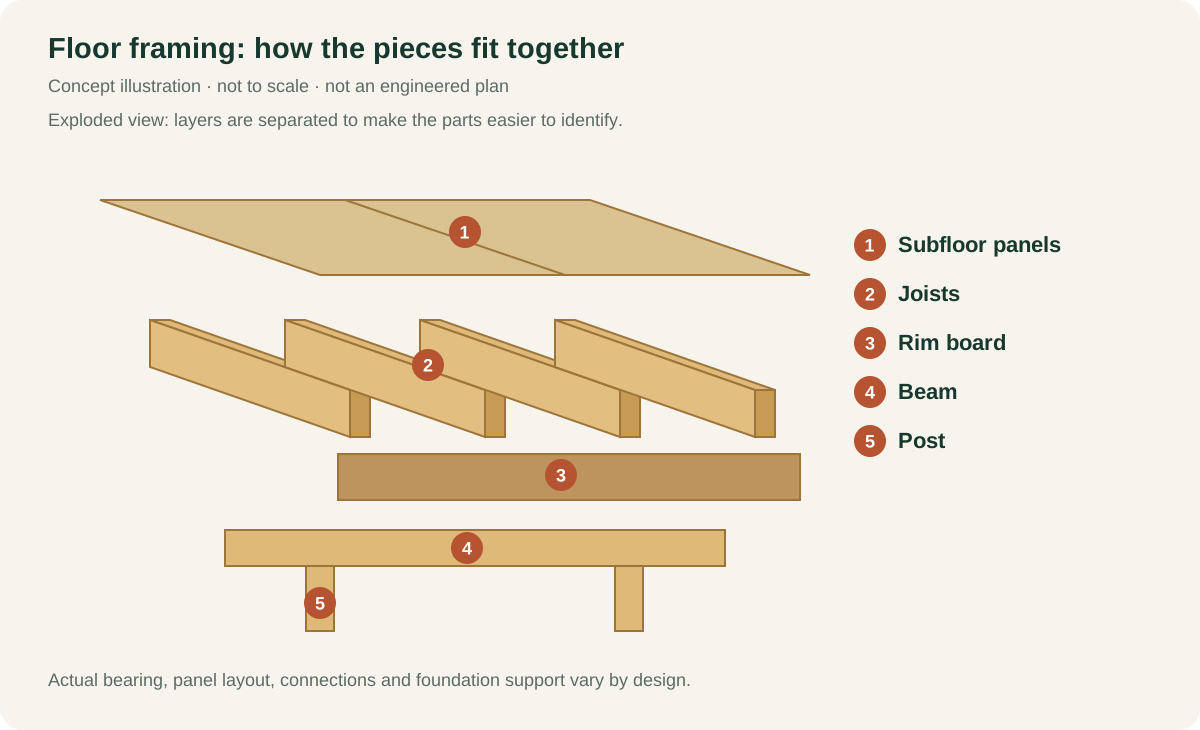
Joists: Repeated horizontal members that support a floor. A floor may use sawn lumber, I-joists or floor trusses. They are not interchangeable just because they occupy similar space.
Subfloor: The structural panel layer over the joists. It supports the floor assembly above and participates in the structural system. The finished floor might be wood, tile, carpet or another material; that choice can affect the subfloor requirements.
Rim board or rim joist: The member closing the perimeter of the floor framing. Its role and connection details depend on the floor system. The outside edge of a floor is doing more than giving siding something to hide.
Beam and post: A beam carries loads horizontally to its supports; a post carries a concentrated load down to the structure below. Follow that path far enough and it must reach appropriate foundation support. A post cannot simply end wherever the floor plan becomes convenient.
Recognize the roof and the skin
A rafter is an individual sloped roof-framing member. A truss is an assembled structural component whose chords, webs and connectors work together. Do not treat a truss web as a stray board that can be removed to make room for a duct.
Sheathing is the panel layer attached to walls or roof framing. Structural sheathing can help the building resist sideways forces when installed as part of the specified system. Roof and wall panels also provide a base for other layers, but they are not automatically the finished water-management system.
Use the names to ask better questions
On a scheduled walkthrough, ask the builder to identify one bearing wall, one major beam and one roof-to-wall connection. Then ask how your planned windows, cabinets and mechanical routes relate to them.
Photograph locations only with site permission and safe access. Label photos by room and direction. “Kitchen, north wall, header over patio door” is more useful later than “wood picture number 47.” Clear names turn a confusing skeleton into a house you can discuss with confidence.
Sources behind this guide
- APA Engineered Wood Construction Guide — Form E30X, revised December 2019, edition consulted